
This is a quick tutorial on setting up Gatsby with Headless WordPress. The source code can be found here. You will need to setup and configure your own instance of WordPress if you want to follow along. The instructions will help you through this.
The simplest way to get up and running WordPress is to use Local By Flywheel. You can download and install the app here https://localbyflywheel.com/
Create a new project called ‘headless’ and add some pages and posts if you like.
First install the Advance Custom Fields plugin from the WordPress admin console.
Next we need to install three plugins, two will expose the WordPress data as a GraphQL endpoint and the other will provide a handy editor for exploring the endpoint.
Download these as zips
Expand the zips, rename then to wp-graphql, wp-graphiql, wp-graphql-acf, and wp-graphql-custom-post-type-ui. The copy the folders to:
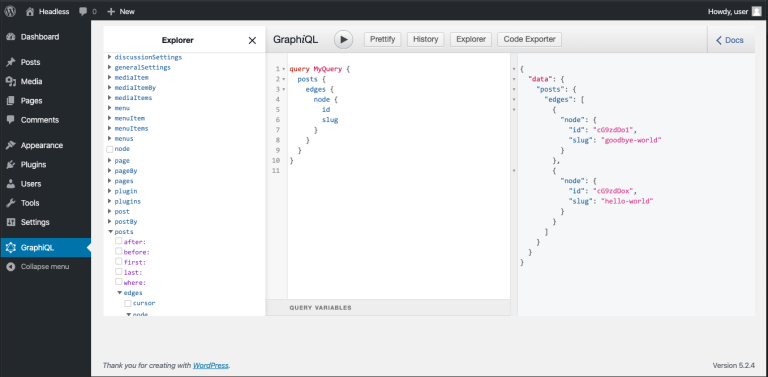
Once you activate both plugins in the Admin console you will see the GraphiQL option in the Admin menu.
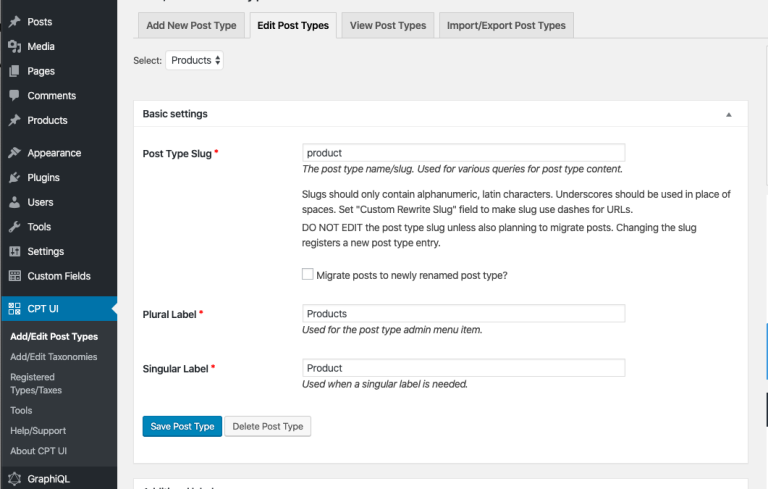
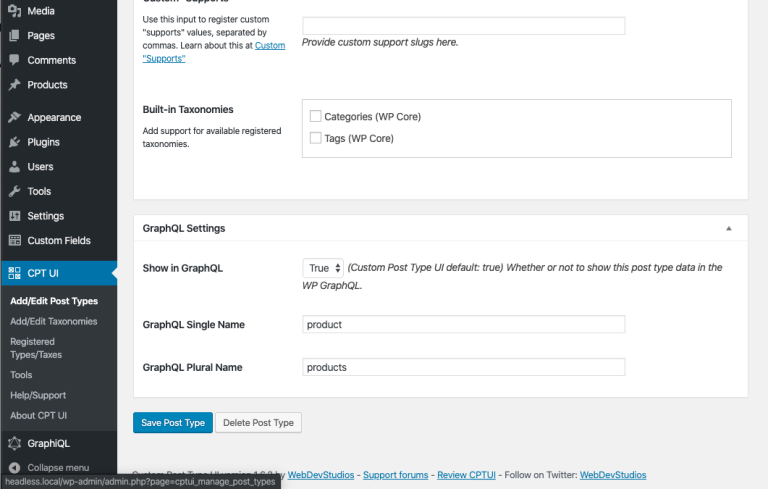
Goto CPT UI and create a new custom Type called Product.
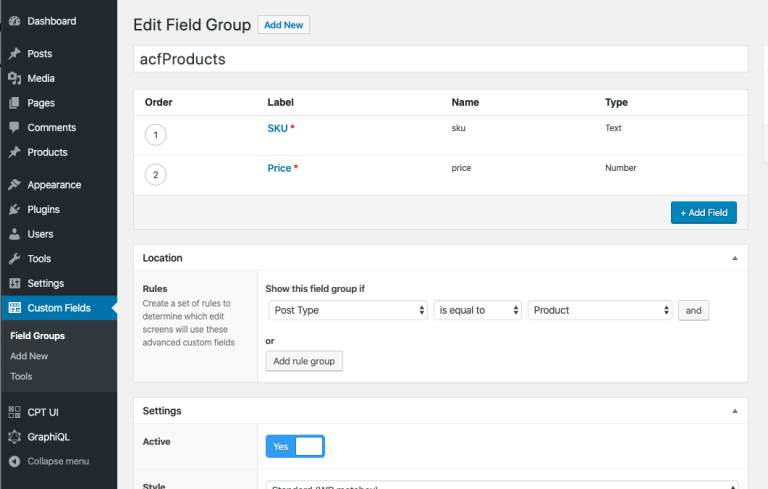
Now create some advanced custom fields on for the Product type.
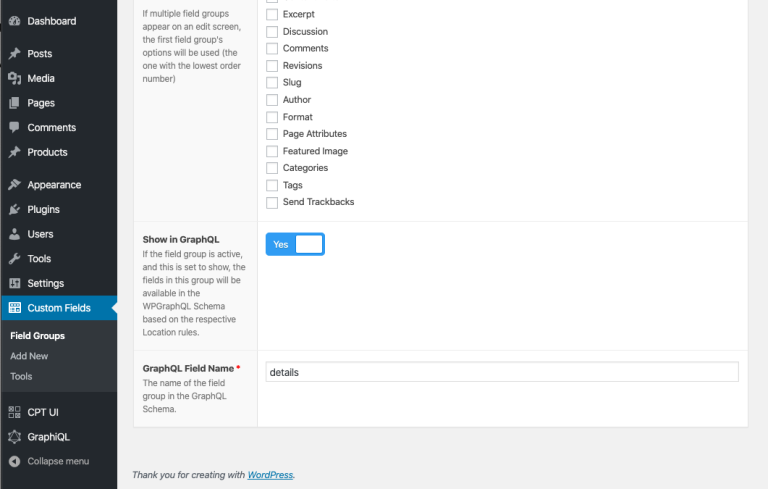
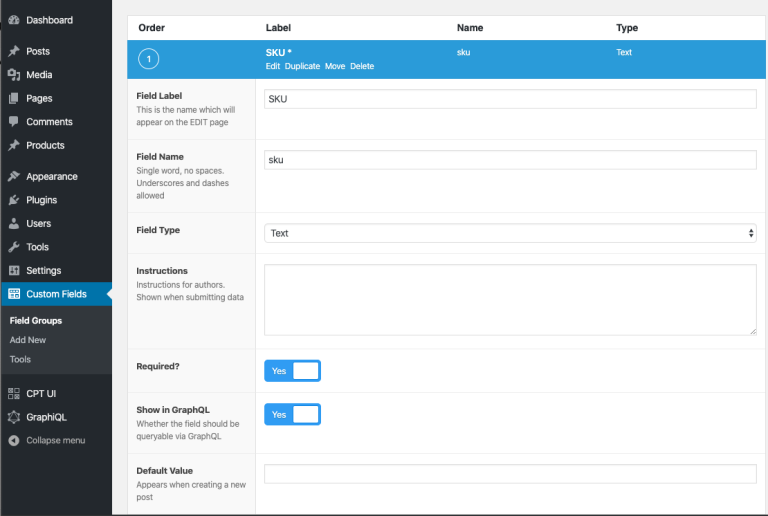
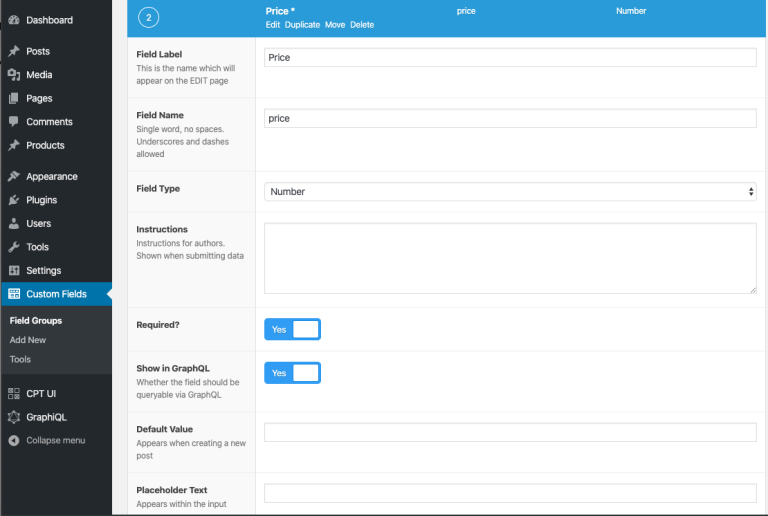
Now add Product using our new custom type and query it in GraphiQL.
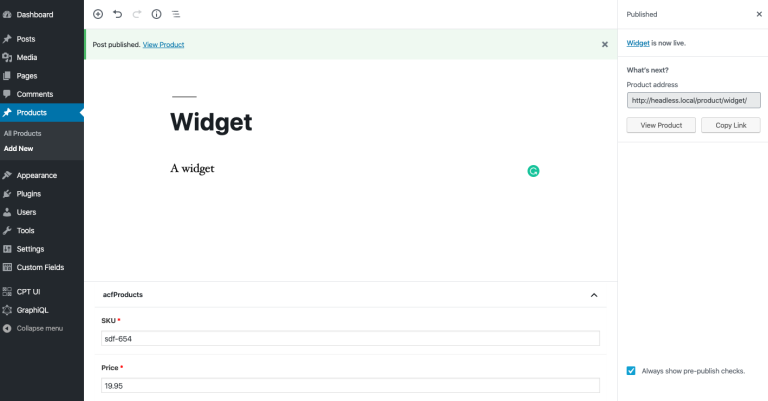
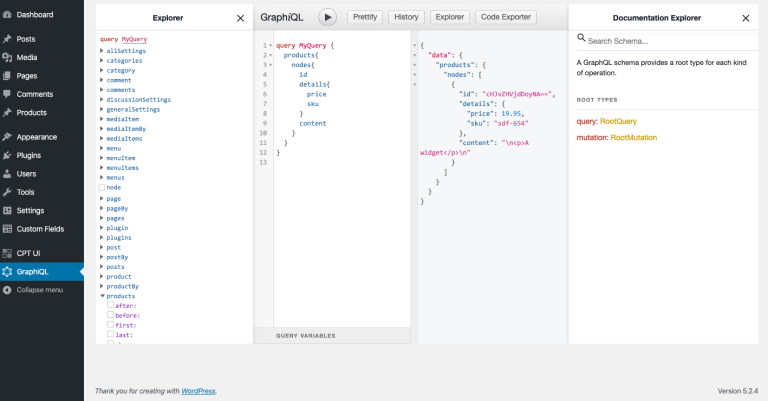
In order to really make use of WordPress as a Headless CMS you will need to upgrade to ACF Pro to get access to Flex Fields and other advanced fields.
If you don’t have the gatsby-cli installed, now is the time. Follow instructions at https://www.gatsbyjs.org/tutorial/part-zero/
Now move to a folder we will create our gatsbyJS project in and run
gatsby new gatsby-wordpress https://github.com/gatsbyjs/gatsby-starter-hello-world
cd gatsby-wordpress
gatsby develop
Open these URLs in your browser to confirm Gatsby is running:
http://localhost:8000
http://localhost:8000/___graphql
Stop Gatsby and install the following plugins then restart Gatsby
npm install --save gatsby-plugin-sharp
npm install --save gatsby-source-graphql
Edit gatsby-config.js.
/**
 * Configure your Gatsby site with this file.
 *
 * See: https://www.gatsbyjs.org/docs/gatsby-config/
 */

module.exports = {
    plugins: [{
        resolve: 'gatsby-source-graphql',
        options: {
            // Arbitrary name for the remote schema Query type
            typeName: 'WORDPRESS',
            // Field under which the remote schema will be accessible. You'll use this in your Gatsby query
            fieldName: 'wordpress',
            // Url to query from
            url: 'http://headless.local/graphql',
        },
    }, ],
}
Now run it.
gatsby developOpen a browser tohttp://localhost:8000/___graphqland you will see your Wordpress data available to GatsbyJS.
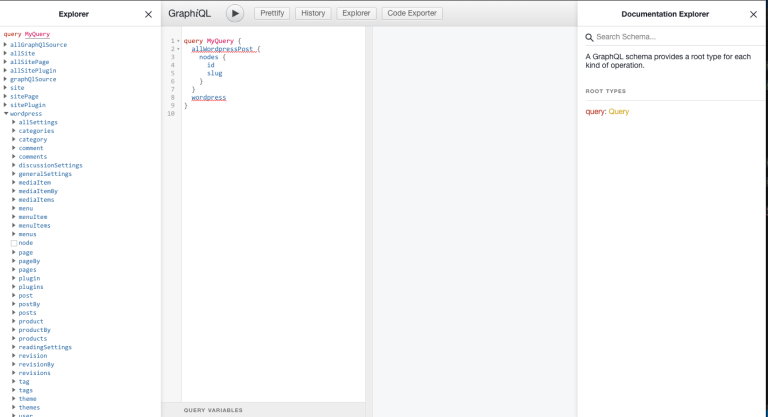
Now it’s just a matter of writing a normal Gatsby app. For this simple example we will generate some Product pages. We first need to create a page in gatspy-node.js then we create the reference template in src/templates/product.js
const path = require(`path`)

exports.createPages = ({
    graphql,
    actions
}) => {
    const {
        createPage
    } = actions
    const productTemplate = path.resolve(`src/templates/product.js`)
    return graphql(
        `
      query Products {
        wordpress {
          products {
            nodes {
              slug
              title
              content
              details {
                price
                sku
              }
            }
          }
        }
      }
    `, {
            limit: 1000
        }
    ).then((result) => {
        if (result.errors) {
            throw result.errors
        }

        result.data.wordpress.products.nodes.forEach((node) => {
            createPage({
                path: `product/${node.slug}`,
                component: productTemplate,
                context: {
                    slug: node.slug,
                },
            })
        })
    })
}
import React from 'react'
import {
graphql
} from 'gatsby'
const Product = ({
data
}) => {
const product = data.wordpress.productBy
return ( <
section >
<
h2 > Product < /h2> <
h3 > {
data.wordpress.productBy.title
} < /h3> <
p dangerouslySetInnerHTML = {
{
__html: product.content,
}
}
/> <
dl >
<
dt > Price < /dt> <
dd > {
product.details.price
} < /dd> <
dt > SKU < /dt> <
dd > {
product.details.sku
} < /dd> < /
dl > <
/section>
)
}
export default Product
export const query = graphql`
query($slug: String!) {
wordpress {
productBy(slug: $slug) {
id
details {
price
sku
}
title
content
}
}
}
`Open a browser to http://localhost:8000/product/widget to view the product page.